THIS IS A MUST SEE FOR ART TEACHERS.
Google has created an amazing program which allows you to tour many great museums: zoom in to see incredible details, interact, save favorite works, etc.
Thank you Google!
 The sketch is bad, but it was a quicky drawing after a whole morning of laborious thought for me to go off of and reference as I made my pattern and mock ups. It has a shallow scoop neckline because that is an oft seen style in the 20's and is also more flattering to me than other styles. It has a front opening because I need nursing access and I didn't want to make a seperate nursing panel. (Most dresses from this period I have seen pictures of open in the back). The lining will be darted to fit and the outer layer will be gathered over the fitted lining. It has moderate size gigot sleeves. (Is there a different name for moderate size gigot sleeves??) I don't need huge sleeves and besides taking more fabric I think the bigger sleeves look ridiculous! I am comfortable with this size but would not go any bigger. At least theoretically on paper. It will have a waistband which will open to a dogleg closure and the skirt will be 3 panels of fabric gathered or gauged to the waistband. The skirt hem is to end just above the ankle, a good "active style" length.
 Then it was time to decide what fabric to use. I decided to use this pretty cream and pink cotton print that David gave me for Christmas last year. It is not exactly historically accurate but it is pretty. He will be pleased I am finally using it. I first tore 3 panels for the skirt, full width and 38" long. I then tore a strip full width and 2.5" wide for the waistband. I then folded the width in half lengthwise and positioned my bodice pieces on it and cut them out.
 After I cut both sleeves, I cut off the little folded piece and added 1" allowance to the cut edge. I cut four of these pieces from scrap. They will be sewn to the sleeves to get the finished shape and I don't think the seams will be very noticeable. This method allowed me to get both sleeves from 31" of fabric - half of what it would have taken if I had folded the fabric lengthwise and cut both sleeves on the fold that way!
  Out of the remaining 1/3 yard of fabric I cut a multitude of bias strips for piping. I plan to pipe all the bodice seams, the waistband and the sleeve seams.
 I threaded the machine and laid everything out so whenever I get the chance I can start sewing the bodice pieces together!
 This morning I tried the bodice on inside out and pinned it shut down the front. I took up darts in the lining fabric only and pinned them in place. Most original gowns I've seen have only one dart on each side of the front but I had so much extra fabric at the waist, I really had to make two darts on each side to get the right contour to the bust and for everything to lay nicely.
  *Note: It is usually not recommended that you pin in darts with your inside out bodice on you. This is because when you turn your bodice right sides out, the side you fitted to, for example, your left bust, will now be on your right bust, and vice versa. If your body is noticeably different on either side, it is highly recommened that you make all darts in a muslin and transfer the muslin to paper, clearly marking "left" and "right" so your final product will fit correctly. I hate bothering with this so I never do it. But for those of you who want to take the time to fit something perfectly, this is what is suggested to do.
 Once the darts were pinned I sewed them in place. Then I gathered the outer fabric down over the darts, and sewed on the waistband. I left 1/2" extending on either edge - the cut edge of the waistband is not flush with the finished bodice edge. This is so later I can turn it to the inside and cover it with the inner waistband.
  I was getting a little tired of working on the dress by this time but thought I should at least pipe the armscyes on the bodice, so I did. I then ran gathering stitches across the tops of the sleeves and drew them up. And that was all I cared to do at the time. Next up is sewing the sleeves into the bodice and then turning my thoughts to the skirt. . .
 Love,
Love, To close, the skirt is first fastened and the bodice then lapped and fastened. This is how it will look when it is shut:
  I then tore a scrap of white cotton into a strip 2.5" wide and about 34" long to use as the waistband facing. I pressed under 1/2" on all raw edges and laid it wrong side down over the waistband on the inside of the dress. I pinned it to the seam lines, enclosing the seam allowances. Here, it is just pinned but since this time I have slip stitched most of the waistband facing to the waistband.
  Then to get an idea of what the dress will look like when it is finished, I put it on my homemade dressform (who is in urgent need of re-shaping and re-stuffing) and pinned it shut. I'm happy with how it looks so far! The skirt is gathered in the front just under the bust gathers per an original dress I've seen photos of (I have pics of the original dress on my Sangamon Settler blog, if anyone wants to see it - it is lovely!) The sides of the skirt are ungathered for a few inches on each side and the back is very tightly gathered.
  Now I must finish attaching the waistband facing and make the hem and the dress is ready for fasteners! :)
 Then, the facing was pressed up inside the skirt and pinned in place. A teeny bit of skirt fabric was turned under as well, just so there is no danger of the white facing showing from the outside! :) I used a running stitch with small stitches on the outside and larger ones on the inside to attach the facing by hand.
  This is a quick and easy way to do a hem and can be done on any rectangular skirt. The hem facing will also take the abuse of wear and can be replaced once it gets dingy and dirty (I have done this before!) thus protecting the dress fabric from getting tatty at the hem prematurely.


 Fig.1. The Lagazuoi overlooking the Falzarego pass situated at the left corner of the photography. The Austrian front line followed the crest of the mountain.
 Fig.2. A romantic view of the war in the Dolomites as seen by the Austrian artist and alpinist Gustav Jahn (1879-1919), who fought in the first world war. Soon the soldiers realized that this war would last much longer than expected and that the beautiful landscape hid a harsh mountain environment that would cost more lifes than the battle operations.
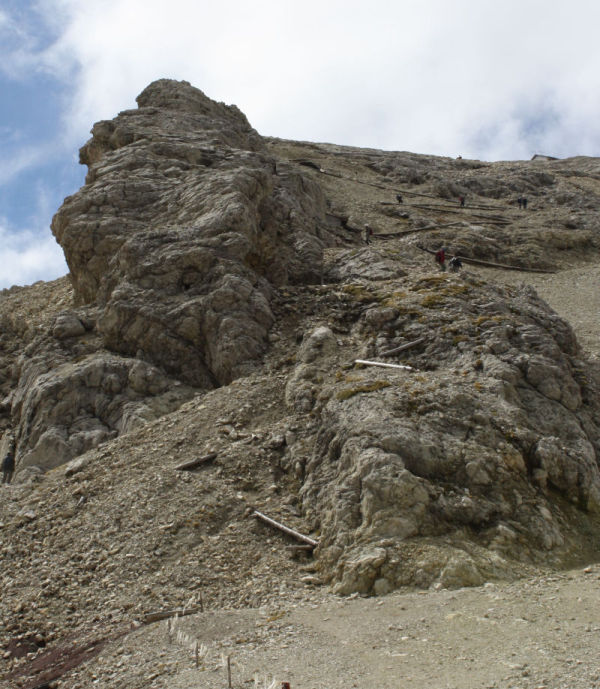 Fig.3. The Austrian front line follows a rock wall on the summit of the Lagazoui - today the huts and the tunnels used by the soldiers are a memorial place.
 Fig.4. A simple hut constructed by the soldiers.
 Fig.5. Inside the hut, the soldiers lived for months, often the entire winter, in such primitive shelters.
 Fig.6. View outside one of the tunnels through a loophole into the valley.
 Fig.7. The Tofane di Roces today.
 Fig.8. The scar in the rock wall and the debris cone produced from the explosion in 1917 is still well visible. The Italian front line was situated in the middle of the rock wall, on the large step visible in the photography, formed by the contact of two stages of the reef-growth during the Triassic.
 Bregner kalles ofte ormegress. Noen sier at det bor ormer der det er ormegress, andre sier at det er helt trygt å gå blandt ormegress, fordi det beskytter mot orm.
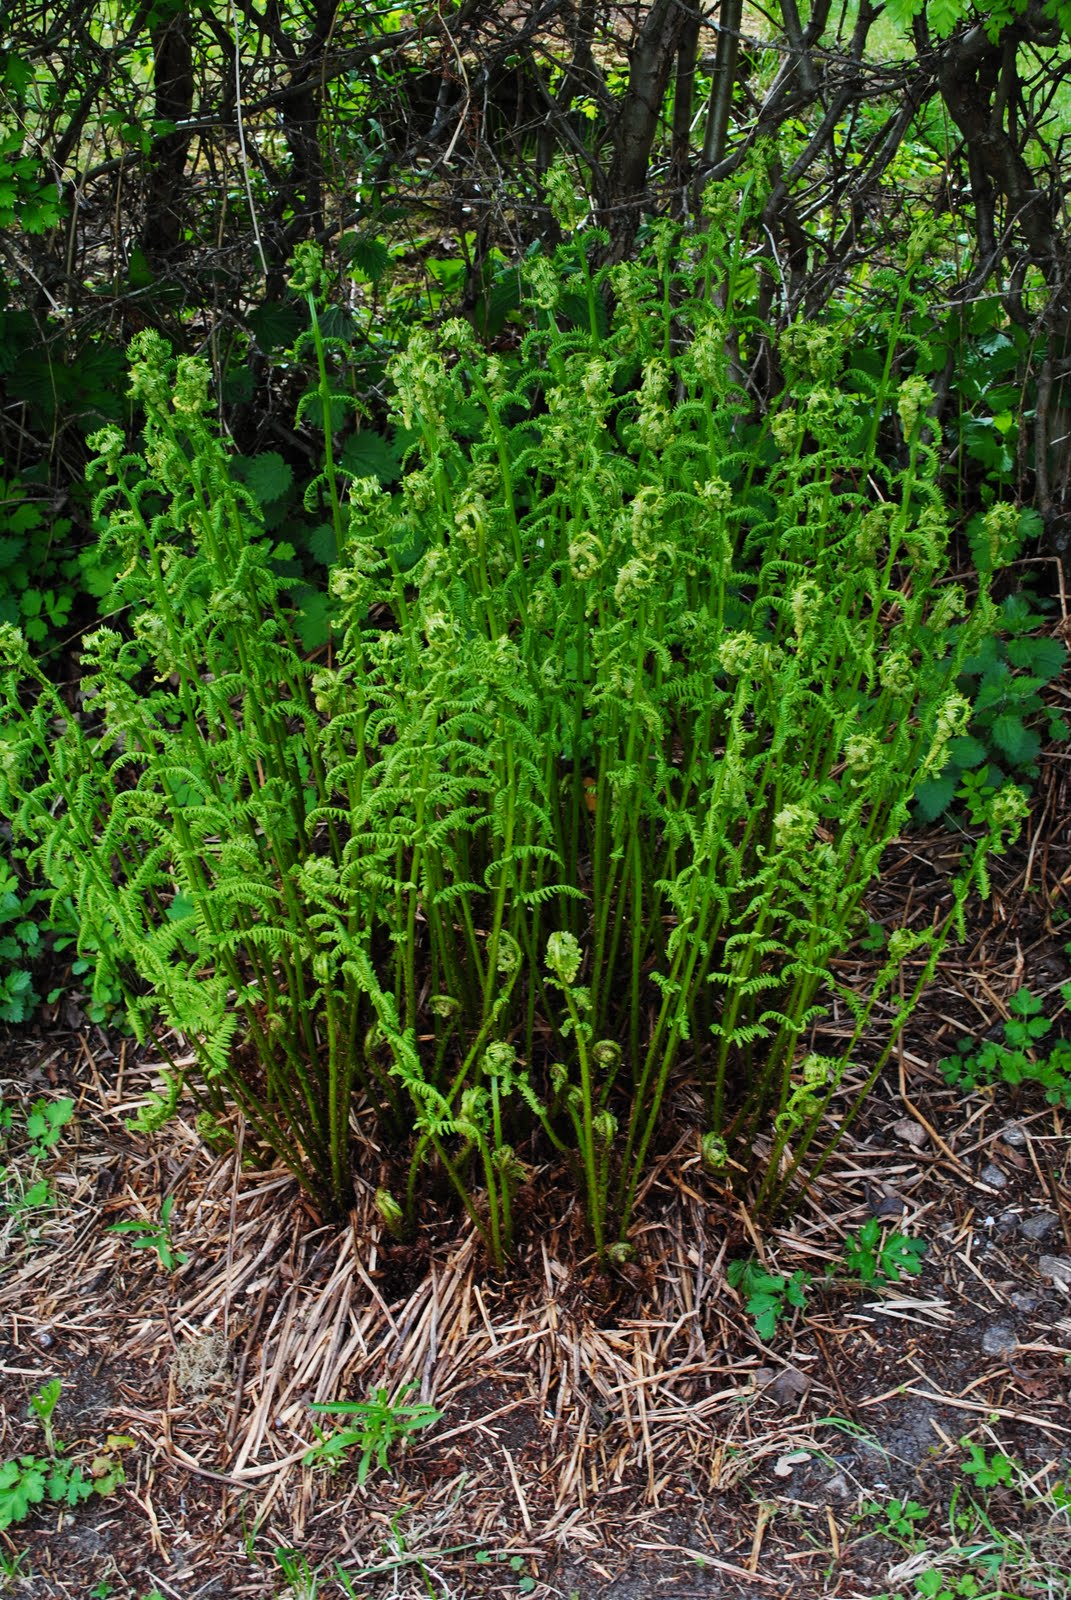 Ormetelg er en gammel medisinplante, tradisjonelt brukt mot innvollsorm. Ormetelg er giftig og må ikke spises.


 Bregner passer på skyggefulle, fuktige steder, f.eks i woodland, ved dammen og i naturlige deler av hagen. Bregner kan beskjæres hvis de blir for store.

Photos: PN Subramanian
at Mulakunnathakavu